Are you looking for a way to keep your customers or followers updated on your latest news? A newsletter is a great way to do this, and with Next.js, it's easy to set up a subscription form and start sending out your newsletters.
Next.js is a React framework that enables developers to create a server-side rendering and static web applications using React. SendGrid is a cloud-based email service that allows you to send and receive emails using your own domain name.
To set up SendGrid, you first need to create an account on their website. Once the account is created, we will need to configure the SendGrid API in your Nextjs application.
Step 1 — Create a sender
To create a sender in SendGrid, you will need to create a new account and verify your email address. Once you have verified your email address, you will be able to log into your account and create a new sender.
To create a new sender, click on the "Senders" tab and then click on the "Create Sender" button.
Enter the sender's name, email address, and description. Click on the "Create Sender" button to save your changes.
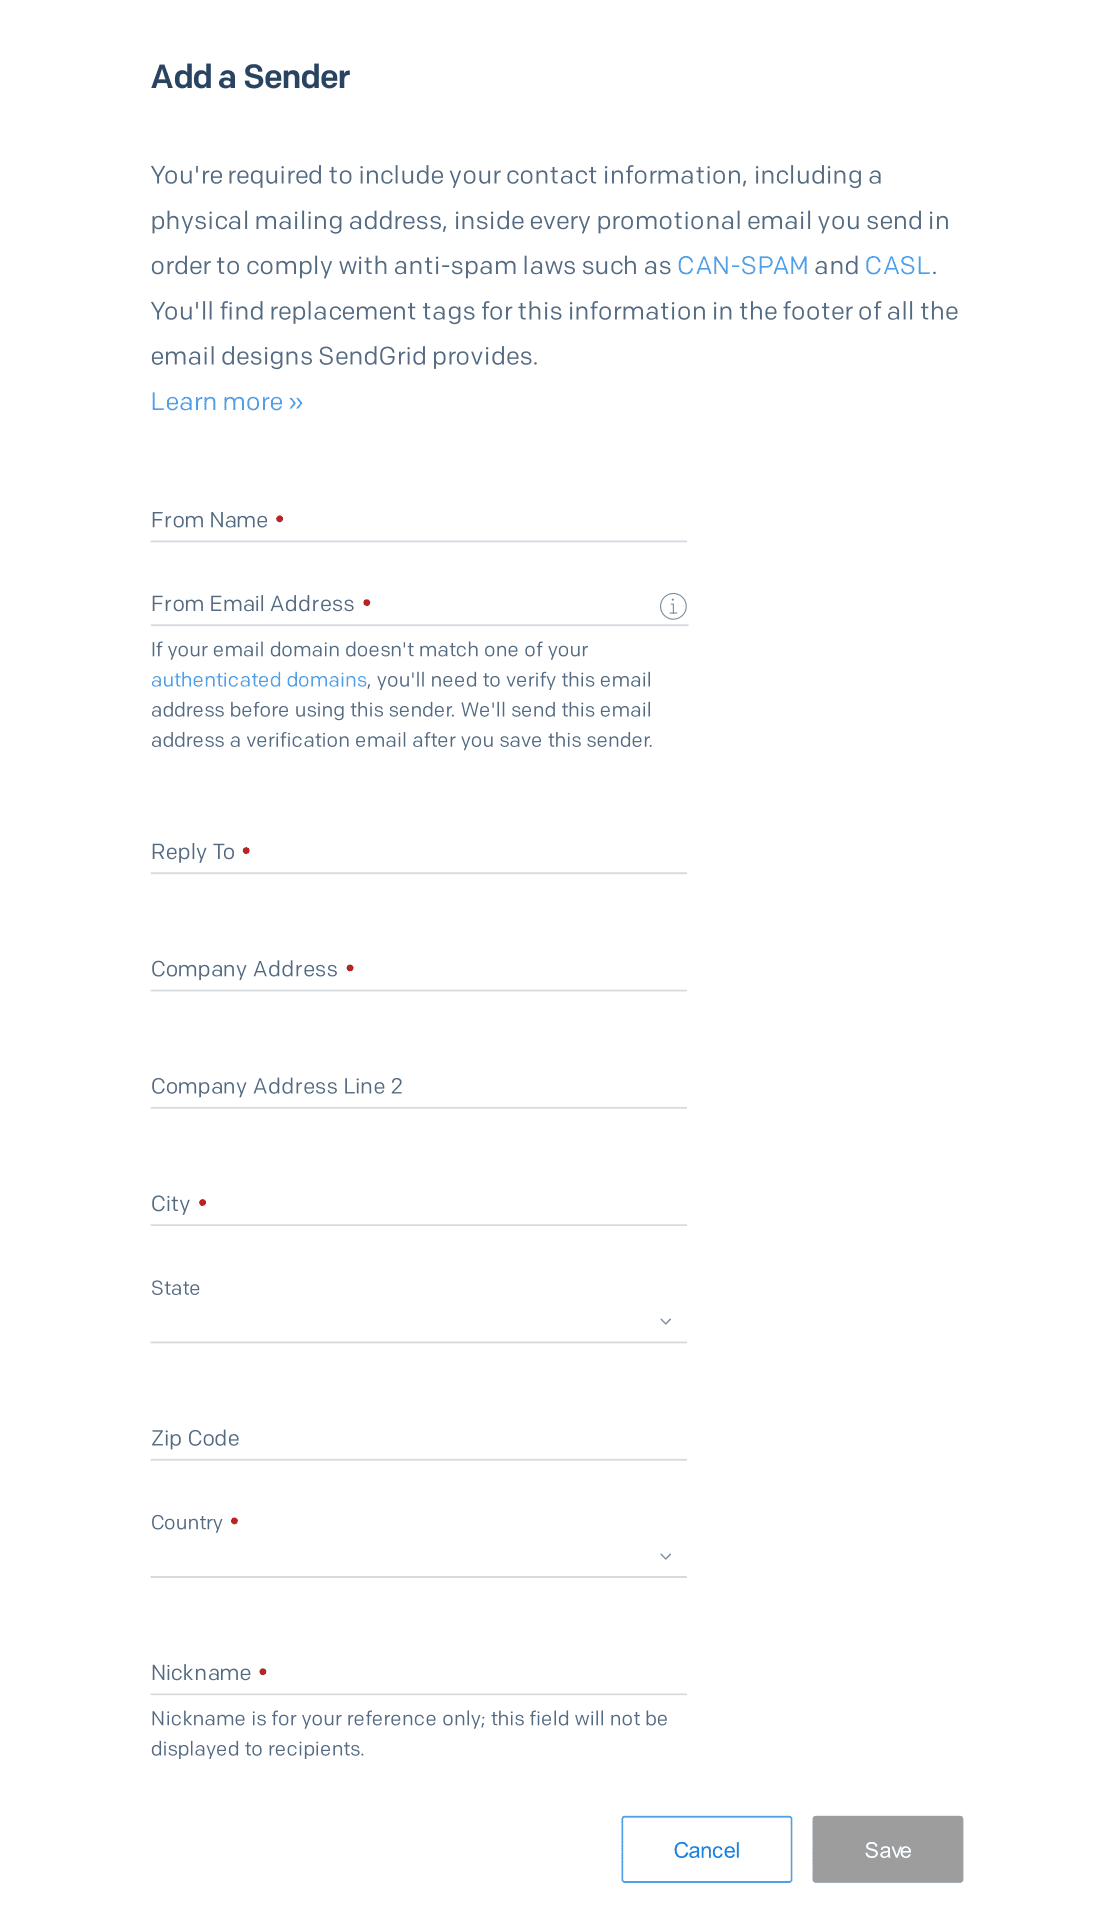
Once our sender is created, we will have to generate our SendGrid API Key.
Step 2 — Create the newsletter form.
// components/ui/Newsletter.tsx
import axios from "axios";
import { useState } from "react";
import { RiLoader5Fill } from "react-icons/ri";
export const Newsletter = () => {
const [mail, setMail] = useState<any | null>(null);
const [loading, setLoading] = useState(false);
const [success, setSuccess] = useState<boolean>();
const [messageState, setMessageState] = useState("");
const Subscribe = async (e: React.FormEvent<HTMLFormElement>) => {
e.preventDefault();
setLoading(true);
axios
.put("/api/mailingList", {
mail: mail,
})
.then((res) => {
if (res.status === 200) {
setLoading(false);
setSuccess(true);
setMessageState(res.data.message);
} else {
setLoading(false);
setMessageState(res.data.message);
}
})
.catch((err) => {
setLoading(false);
setMessageState(String(err.message));
});
};
return (
<section className="container mx-auto my-10 max-w-7xl px-4 sm:px-6 lg:px-8">
<div className="grid items-center gap-10 bg-black py-[15%] px-[6%] dark:bg-zinc-900 md:p-[6%] lg:grid-cols-2">
<div>
<h3 className="text-5xl font-semibold text-white">
Join my newsletter
</h3>
<p className="mt-5 text-lg text-neutral-200">
Join my newsletter to get new posts before anyone else, I'll
send you an email with links to all of the articles.
</p>
</div>
<form onSubmit={Subscribe}>
<div className="gap-3 md:flex">
<input
type="email"
className="peer block w-full rounded-md border-gray-300 bg-black py-3 pl-7 pr-12 text-white focus:border-white focus:ring-white peer-invalid:text-pink-600 dark:border-zinc-500 dark:bg-zinc-900 dark:focus:ring-white sm:text-sm"
placeholder="Your Email"
autoComplete="email"
required
onChange={(e) => setMail(e.target.value)}
/>
<button
disabled={loading}
type="submit"
className="mt-5 w-full rounded-md bg-white py-3 px-5 text-black hover:bg-gray-200 disabled:cursor-not-allowed disabled:bg-opacity-60 md:mt-0 md:w-auto"
>
{!loading ? (
"SUBSCRIBE"
) : (
<div className="flex w-full items-center justify-center ">
<RiLoader5Fill className="w-8 animate-spin" />
</div>
)}
</button>
</div>
{success ? (
<p className="mt-2 text-green-400 dark:text-green-400">
{messageState}
</p>
) : (
<p className="mt-2 text-pink-500 dark:text-pink-500">
{messageState}
</p>
)}
</form>
</div>
</section>
);
};
The code above is a newsletter subscription form that uses the React Hooks useState and useEffect. The form includes a loading state, success state, and message state. The form also uses the Axios library to make a PUT request to the /api/mailingList endpoint.
The useState hook is used to create a mail state, loading state, success state, and message state. The useEffect hook is used to make the Axios request when the form is submitted.
The Axios library is used to make a PUT request to the /api/mailingList endpoint. The request includes the mail state. If the request is successful, the success state is set to true and the message state is set to the response data. If the request is unsuccessful, the message state is set to the error message.
Step 3 — Create the mailing list.
This code is a mailing list API that allows users to subscribe to a mailing list. The API uses the SendGrid API to add the user's email to the mailing list. If there are any errors, the API will return a status of 500 and a message. Otherwise, the API will return a status of 200 and a message.
// pages/api/mailingList.ts

import type { NextApiRequest, NextApiResponse } from "next";

type Data = {
  message: string;
};

export default async function handler(
  req: NextApiRequest,
  res: NextApiResponse<Data>
) {
  const email = req.body.mail;
  const url = `https://api.sendgrid.com/v3/marketing/contacts`;

  const data = {
    contacts: [{ email: email }],
    list_ids: [process.env.SENDGRID_MAILING_ID],
  };
  const headers = {
    Authorization: `Bearer ${process.env.SENDGRID_API_KEY}`,
    "Content-Type": "application/json",
  };

  const options = {
    method: "PUT",
    headers: headers,
    body: JSON.stringify(data),
  };
  const response = await fetch(url, options);
  const json = await response.json();
  if (json.errors) {
    res.status(500).json({
      message:
        "Oups, there was a problem with your subscription, please try again or contact us",
    });
  } else {
    res.status(200).json({
      message:
        "Your email has been succesfully added to the mailing list. Welcome 👋",
    });
  }
}
Step 4 — Create the contact list.
There are a few ways to create a contact list in SendGrid. The easiest way is to use the "Contacts" tab on the left-hand side of the SendGrid interface. From there, you can click "Create List" and enter the necessary information.
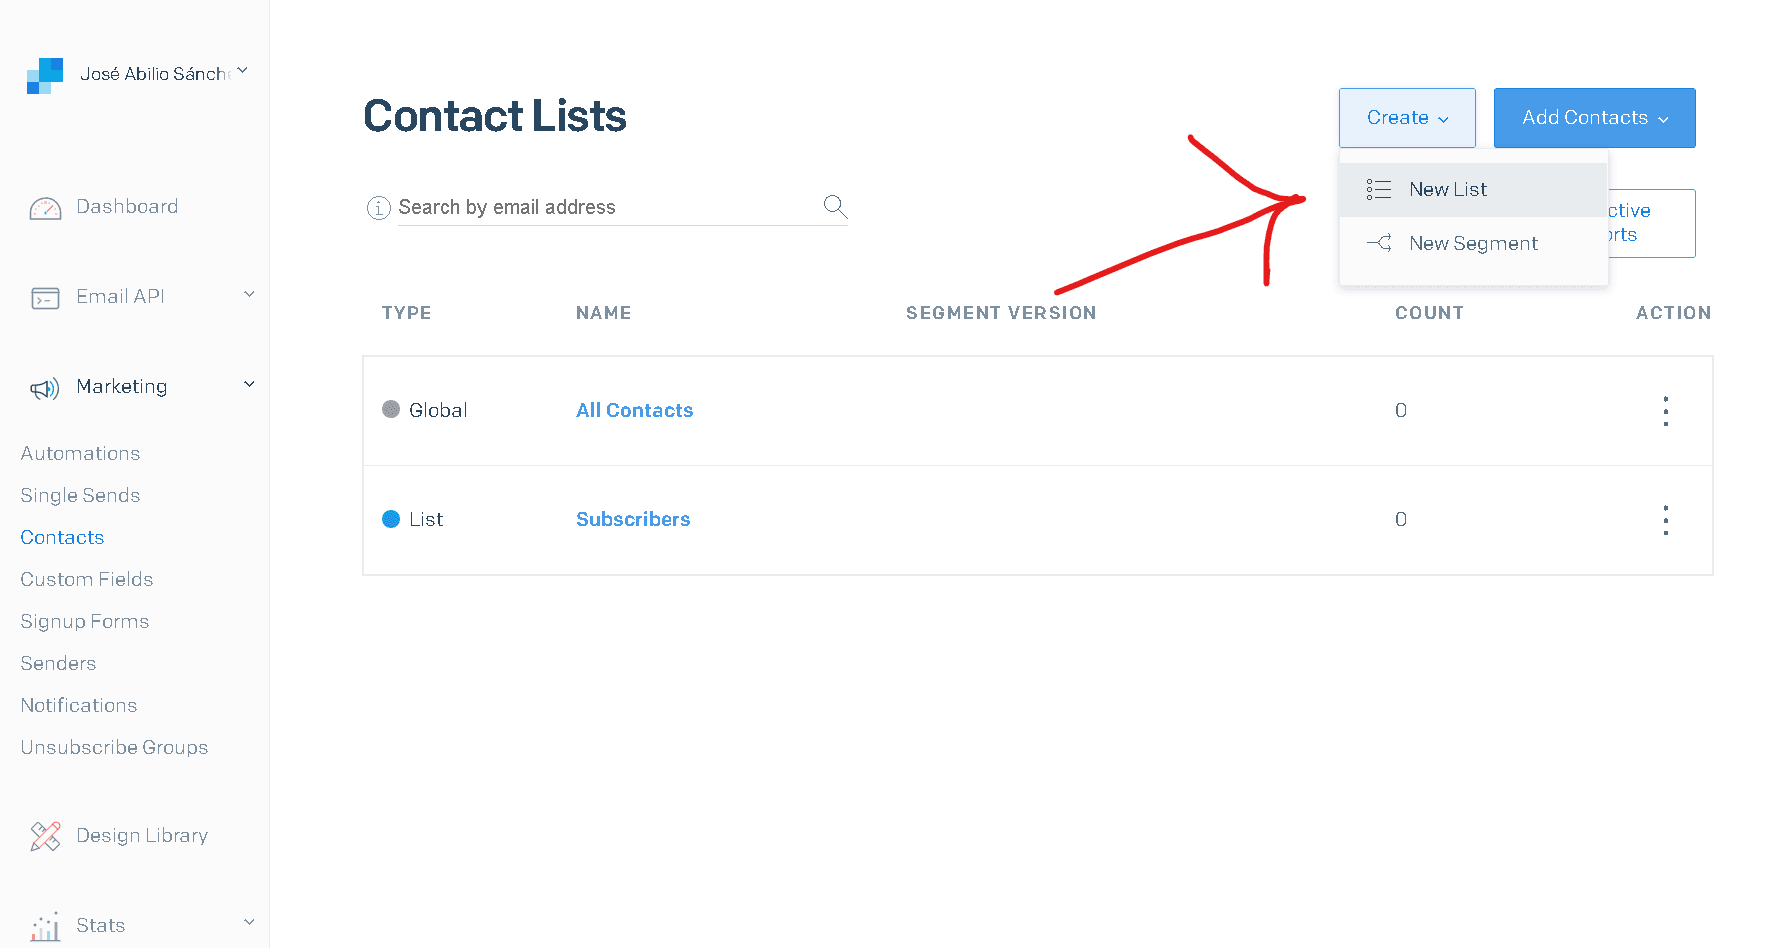
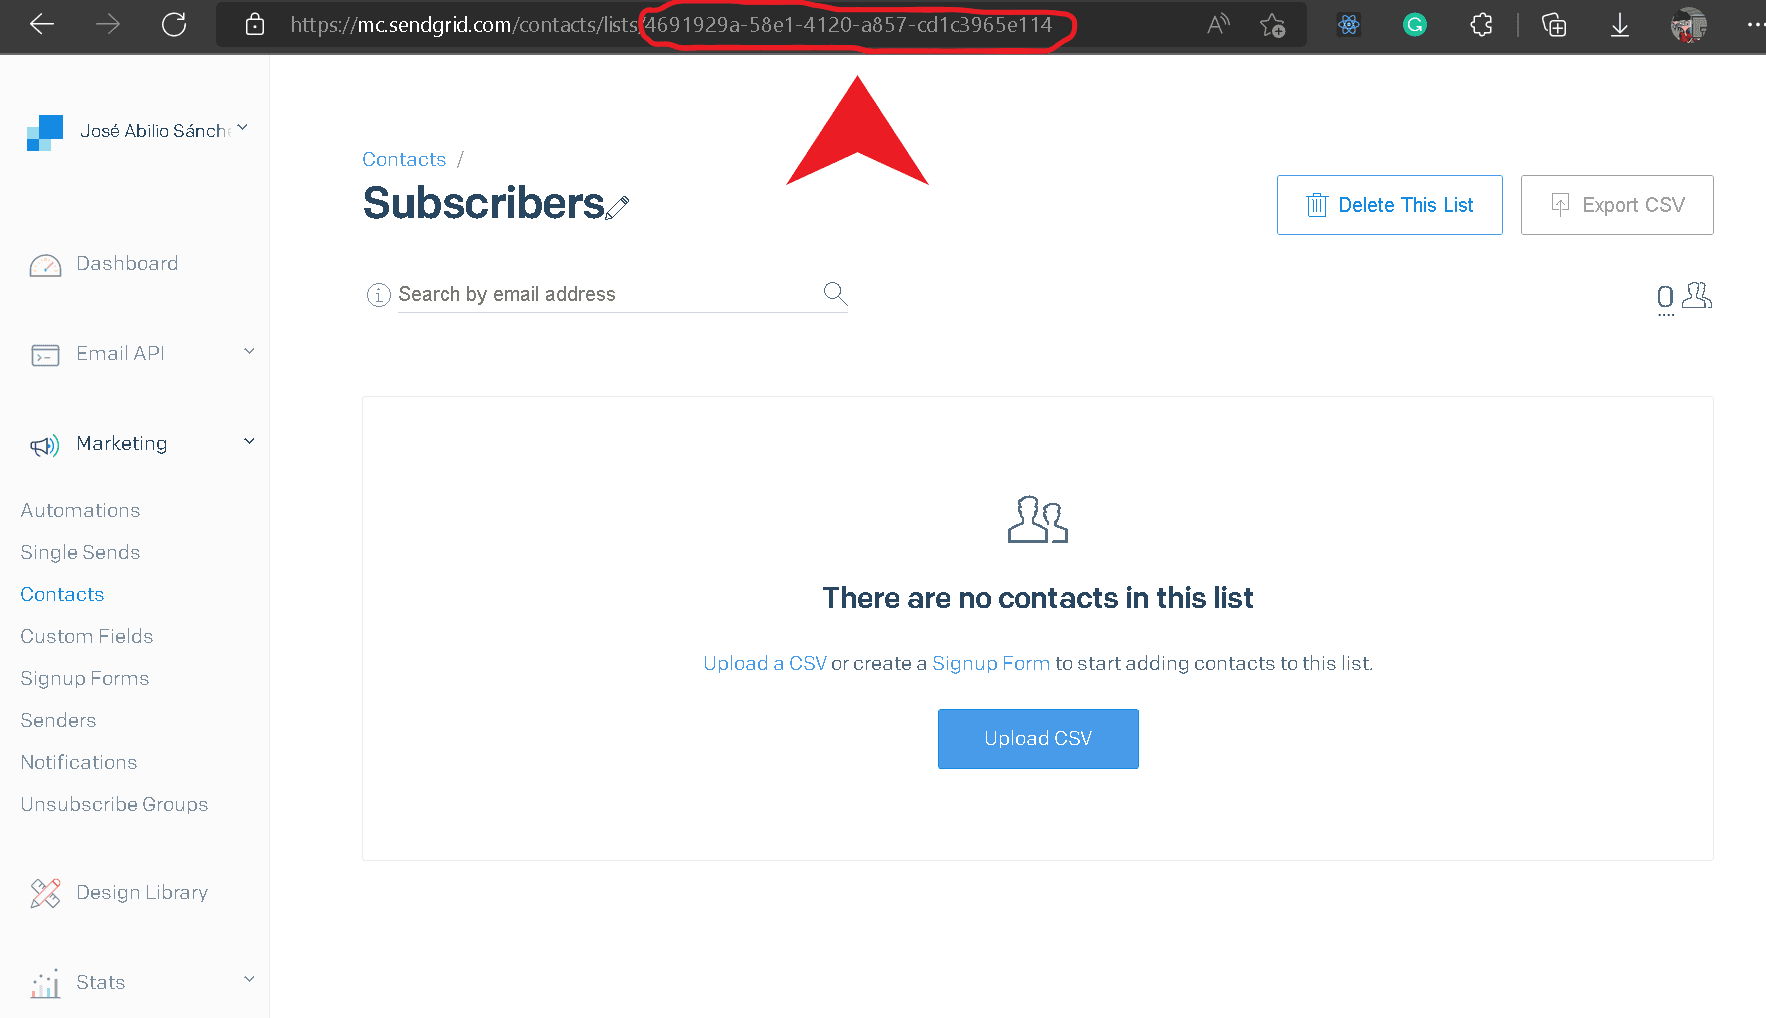
Once our new contact list is created, we will have to copy the code generated from our list to place it in our SENDGRID_MAILING_ID You can find the id in your address bar.
Step 5 — Add to Environment
Create a file named .env at the root of your project. And add the following code there. This can also be done directly into the code, but environment variables are better.
SENDGRID_API_KEY=”YOUR API KEY HERE”
SENDGRID_MAILING_ID=”YOUR MAILING ID HERE”
Step 6 — Call the Newsletter component on our index.
// pages/index.tsx

import type { NextPage } from "next";
import { NextSeo } from "next-seo";
import { GeneralLayout } from "../components/layouts";
import { Newsletter } from "../components/ui";

const HomePage: NextPage = () => {
  return (
    <GeneralLayout>
      <NextSeo title="Newsletter Form" />

      <div className="">
        <div>
          <h1 className="text-3xl font-bold text-center">Newsletter Form</h1>

          <Newsletter />
        </div>
      </div>
    </GeneralLayout>
  );
};

export default HomePage;
Step 7 — We test that everything works.
This is our first look at our index page.
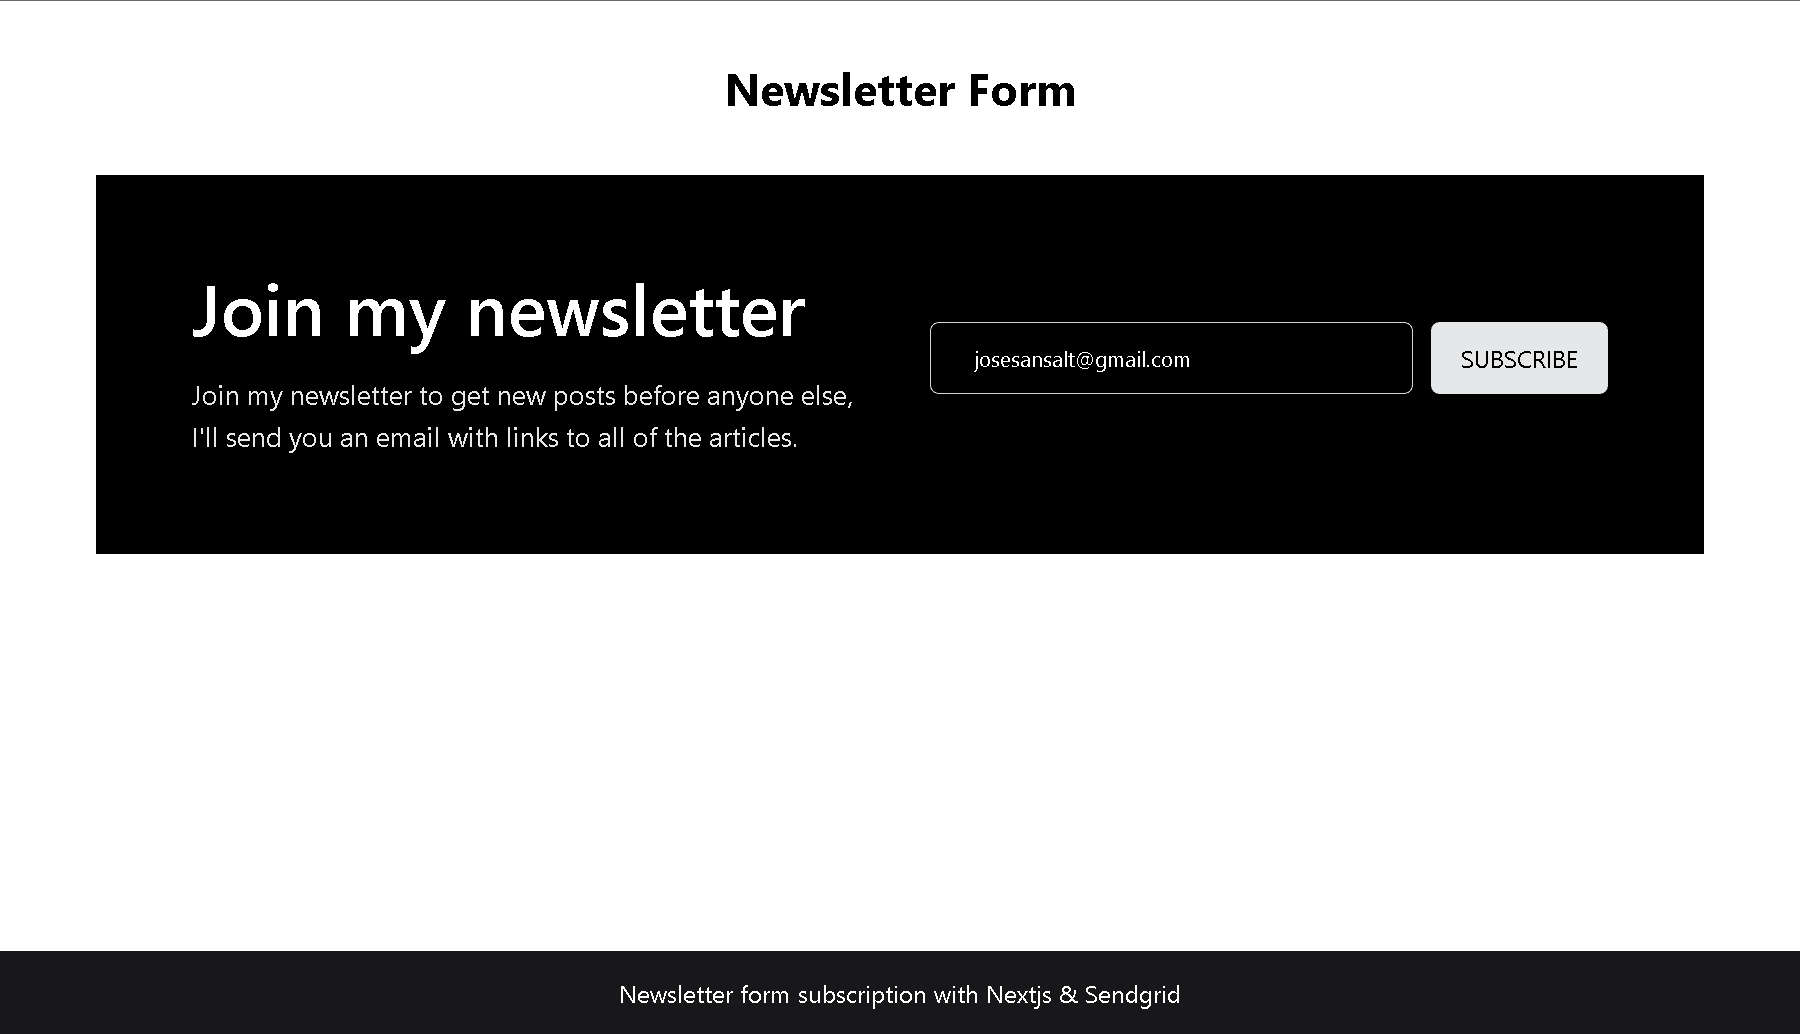
Now place an example email to verify that there are no problems.

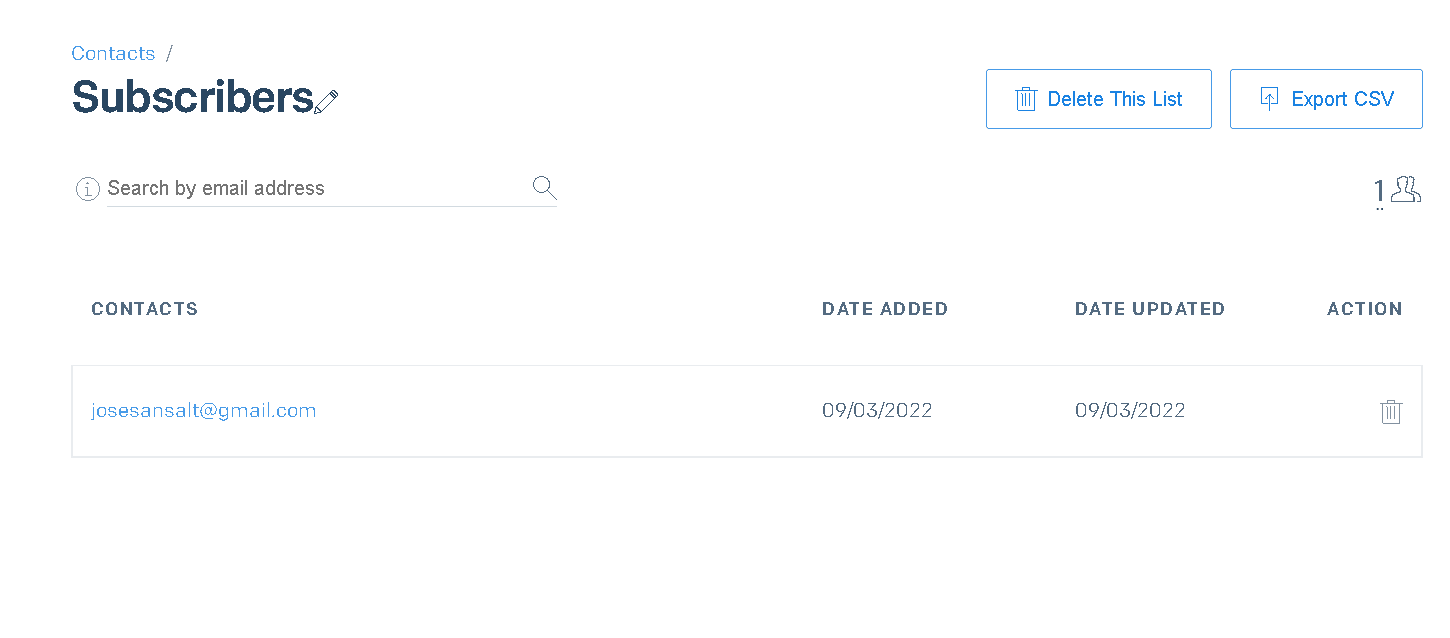
Now if we review our SendGrid contact list we can see the previously entered email.
And if you prefer you can configure SendGrid to send an email automatically every time a user registers their email like I just did.

GitHub repo:
https://github.com/SALT0S/newsletter-nextjs-typescript-sendgrid

